Sometimes the greatest photo opportunities come in the dark. When the sun goes down, or you are in a darkly lit space, it can be very difficult to nail the perfect shot. From washed-out photos with unreadable detail to blurry messes, the struggle is definitely real.
But with a little patience, a little practice, and the following tips, you can find your way to taking better cell phone photos at night and take your photography game to the next level.
1) Use an app for long exposure
When using a traditional film or digital camera, you have the ability to control your shutter speed. By slowing the shutter speed and creating a longer exposure, you allow more light to enter and can create a better photo in low light situations. Android and iOS both offer a variety of photography apps that allow you to control these settings. Some of these apps even have a dedicated ‘night mode’ option so take a look at what’s and see which one will best suit your needs.
2) Keep the camera still
Camera movement is the enemy of low light photos. Any movement at all can cause the image to blur and this is compounded when using a long exposure. Using a tripod is the most effective way to create stability for your cell phone camera. While it may not always be ideal to lug around a big, traditional tripod, smaller, more convenient and compact options are available. A tripod with a wireless remote option will give you an extra layer of stability by allowing you to set up your shot and snap the photo without having to touch the phone at all!
3) Take advantage of backlighting
Sometimes you will find the darkness can help you create the most stunning effects. A light source located behind your subject will create a stark contrast and give you a silhouette that stands out against the background. You may have to position yourself a few times to get the effect you want but the effort is more than worth it.
4) Use your flash

Using your flash in a low light scenario is a bit tricky. If you are trying to capture something that is far away from you, the flash will only create a fuzzy foreground and your actual subject will be too dark to read. If you are shooting something up close, the flash will bleach it and wash it out. The flash is best for subjects at a medium distance. Flashes are not a perfect solution to your lighting troubles but they can help you create some interesting effects. Because they can be really bright and cause a flatness in your images, you can try softening the flash by placing a tissue over it or applying a color filter during your editing process.
5) Use an outside light source
For the best photo, take advantage of external light sources. This could mean being resourceful. Flashlights, car headlights, lamps, street lights, and signs can all help you light things up the right way. To make sure you always have the best available external light, consider picking up a light ring for your phone. Easy to use and portable, ring lights give you a greater amount of control by providing different brightness options.
6) Use HDR on a limited basis
HDR is a wonderful tool for creating clear and beautiful shots. Most cell phones have a built-in HDR mode. It works by taking several photos in rapid succession using different exposures and then combines them into a single photo with the best dynamic range. It gives you detail in the dark areas without overexposing the bright ones. Unfortunately, in low light situations, HDR often produces a blurry image. Again, it can work for you so do not be afraid to play around. For best results use HDR along with a tripod. The more stable the camera stays, the better the shot.
7) Edit the image
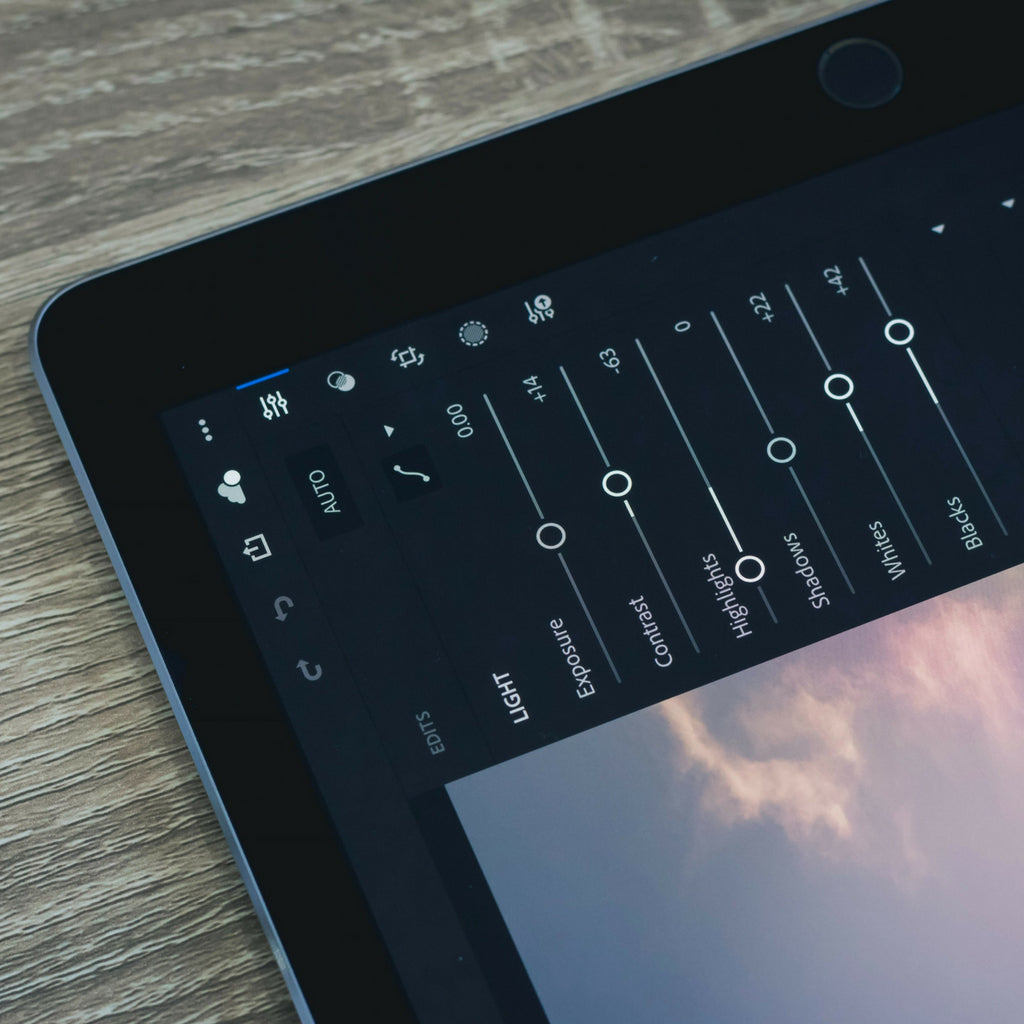
Exposure and contrast are everything in low light photography. If you cannot control them when you are snapping the photo, adjusting them with editing software can really make a difference. Applying standard filters is good but for a real stand out image, it is best to do the editing yourself. If you do not want to invest in expensive desktop software, there are lots of available apps for you to use directly on your cell phone. One of the coolest things about editing your photos is that you can turn perceived flaws into assets. If you are lacking the right color contrasts, try adjusting the image to black and white. You may find this creates a better play between the shadows and the light source. If your photos are grainy, they may come to life when you adjust color saturation and brightness. Again, do not be afraid to experiment, you never know what you might find when you do!
