Thanks to smartphones it’s never been easier to take a photo. And not just take a photo but take really good photos, almost professional quality photos.
Want to know how to get from “almost professional quality photos” to “wow, that looks like it was taken by a professional photographer”?
Here are our top 10 mobile photography tips that will take you to the next level.
1. Clean the Lens
Think about it. How often do you take your cell phone out of your pocket or bag, check your messages or news feeds, then slip it back? Hundreds of times?
What do you think that does to the lens on your phone?
Dirt, dust and other contaminants that collect on the lens from daily use block light, which shows up as blurs on your photos.
That smudge right over your significant other’s face? It’s caused by a dirty lens.
So, right before you take a picture, take out a soft lens cloth (not just any cloth, a lens cloth, other types of cloth can scratch) and clean the lens.

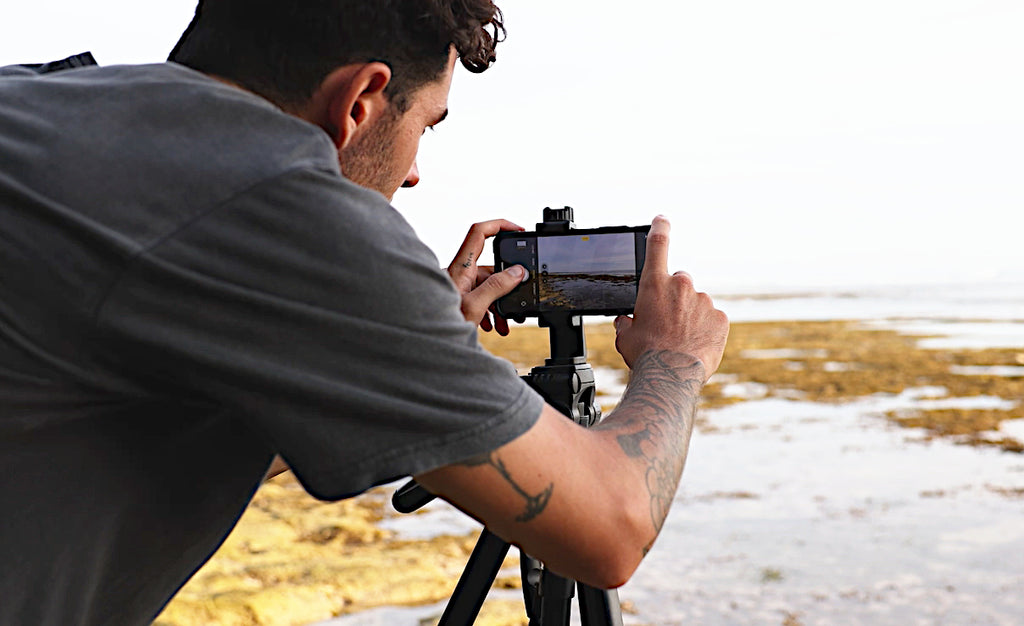
2. Hold Steady
Another essential way to instantly help improve your photos is making sure that your camera or phone is completely steady.
The best way to do this is by using a tripod. A tripod is an essential tool for photography. You don't need to get anything crazy of the bat, just a simple tripod will do.
Now a days there are all kinds of different types of tripods out there. If you're just starting out, you'll definitely want to get a full size tripod. It doesn't have to be top of the line, basically any mid tier tripod will do.
You'll also need a phone mount for your tripod. While some tripods come with one, most of the time they are cheap and hard to work with.
We recommend our UniMount 360 Phone Tripod Mount. It can fit any size phone, rotates between landscape and portrait and even includes a Bluetooth remote shutter.

3. Focus
This is easy. Most smartphones display a small yellow square as the focus point. Make sure your subject is in the frame, then simply tap the screen where you want it to focus.
Pro tip: when you’re shooting people or animals focus on the eyes.
4. Adjust Exposure
When you set the focus on your cell phone camera, you also set the exposure, meaning how bright or dark the image will look. Sometimes, you might want to set the exposure yourself.
Could be for artistic reasons (you want something to abnormally bright or dark to emphasize a mood), could be you just don’t think your cell phone camera is “seeing” the image the way you’d like it.
While you can adjust the exposure afterward, pro photographers usually recommend setting the right exposure when you take the picture for the easiest and best results.

5. Avoid Zoom
Okay, you’re at a concert in the cheap seats and you want that close up shot of your favorite band so you can actually see their faces.
We get it. But for other kinds of photos, the ones you want to have that pro look, avoid using zoom.
Cell phone cameras have a digital zoom, not an optical zoom like you’d find in a “real” standalone dedicated camera.
A digital zoom crops the image and reduces its quality. If you want to get in a real tight shot, don’t use the zoom, just walk closer to the subject.
6. Rule of Thirds
You can put a grid over your camera’s screen. (On an iPhone, go to Settings>Photos & Camera to turn the Grid on.)
What that does for you is divide the view screen horizontally and vertically into thirds. You want to position your subject off-center in line with one of vertical lines.
Not in the dead center of the grid, which is what most inexperienced photographers think.
Take a look at the photos you find most interesting. In almost every case, you’ll find the subject is placed off-center.
7. Bend Down, Get High
Getting down to take a picture from ground level up provides a different perspective than from standing in a normal position.
As does taking a picture looking down from a higher elevation.
Cell phone cameras are great because they are light enough to carry and snapshots from different positions that might otherwise be awkward.
8. Take Multiple Shots
Here that continuous clicking noise from cameras at news events?
Pro photographers aren’t looking for the perfect shot, they take a series of shots and then later go back to find the perfect shot.
No one just takes a picture that turns out to be the best picture possible. (Well, okay, sometimes you can, but not all that often.)
Take multiple shots from various angles and distances, delete the ones you don’t think came out so well, keep the ones that did.
9. Go Panorama
Can’t get everything in that one shot? This is where panorama mode comes in handy.
On an iPhone, swipe left until you see Pano selected.
Hold the camera in portrait orientation, point to the left-hand side of the image you want to capture.
Tap the shutter button and pan slowly to the right to capture the full scene.
As you’re panning, you should see a yellow line to follow. The slower you can pan, the better the image.
10. Put it in Black and White
Eliminating color and putting everything in black and white isn’t just a retro look, it can help bring out details and give the image an artistic feel.
This is particularly true if your shot contains a lot of colors that are distracting from where you really want the eye to focus.
You can easily convert a color photo to black and white, but in some situations you may want to consider shooting in black and white in the first place.
Try these tips out and see how they work! Even if you utilize just 1 or 2 it can make a huge difference in your phone photography.
Products You Might Like